


Guest blogger Monique Palomares works with me on Mama Lisa’s World en français and Mamá Lisa’s World en español. Monique was also a 1st grade teacher for many years. Now she helps other classes on special projects and accompanies them on trips from time to time.
Background: Some classes in France take their students on a trip for a few days during the school year. The excursion will normally focus on a specific theme. This year, Monique accompanied a class on a trip to a book making facility. The week revolved around teaching the children how to make their own books. Here’s what Monique wrote about the process…
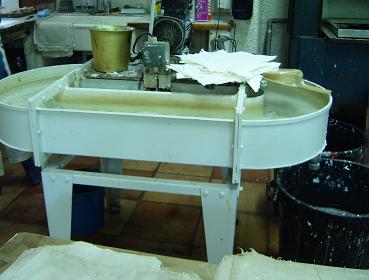
PRINTING A BOOK – Step 1 Making the Paper
Hand-made paper: this type is made with cotton cloth. The cotton is ground with water until reaching a thin consistency. You can see some dry sheets in the photo below…
Cotton pulp in the frame: The frame drains most of the water out, then you turn it over onto a piece of material (flax cloth) and alternate paper and cloth.
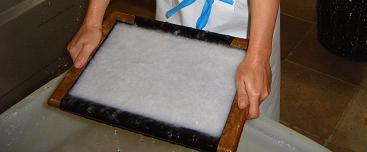
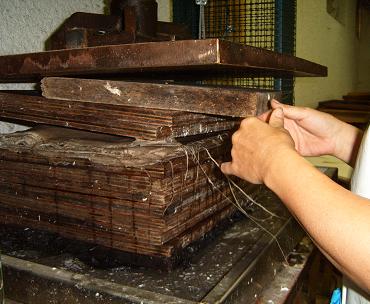
We made about a dozen of pieces of paper before we put them under the press to take all the water out and then hanged them to dry like laundry.
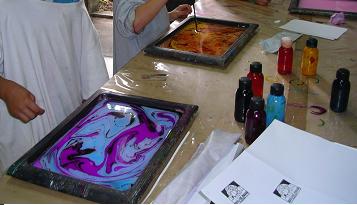
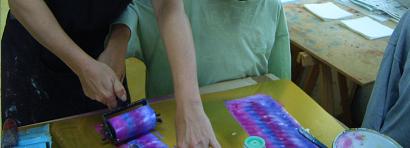
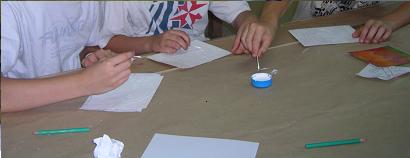
Step 2 Marbling the Paper – A Decoration for the Front and Back Cover of the Book
Pour some water, a spoonful of milk, and three or four drops of three different marbling inks. Allow to spread, then gently blow to make them swirl. Take a thin stick and gently draw lines on the surface: from the center to the rim, or from the rim to the center, or a grid pattern. Softly lay a sheet of paper on the surface of the water and gently pat it so that the ink gets fixed on it. Remove the sheet of paper holding it by the edge (not the corners!), lay on a flat surface and gently blot the water. Hang to dry.

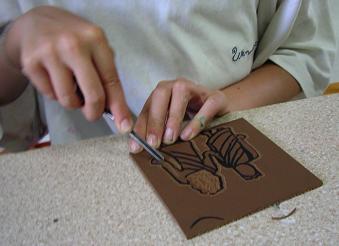
Step 3 Decorating the Inside of the Book – : Make a simple drawing and place a piece of thin cardboard (shoe-box type) below it. Then go over the drawing firmly. Go over it again on the cardboard so that it’s kind of carved into the cardboard.
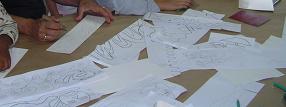
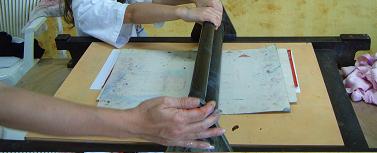
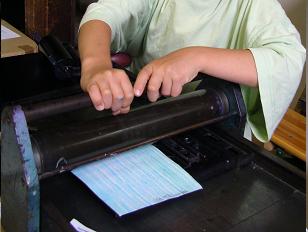
Step 4 Printing the Pictures: You need printing ink and an ink roller and an old cloth to protect your actual clothes since printing ink can’t be removed.
To print, you have to lay a protective paper below your work (like a page of a magazine) so that the ink won’t get on the lower part of the press. Then you put down the inked pattern (inked part up). Next you put down the paper to print, then another piece of protective paper (another page of a magazine), then a piece of thin cardboard (shoe-box like), then you roll the printing roll back and forth.
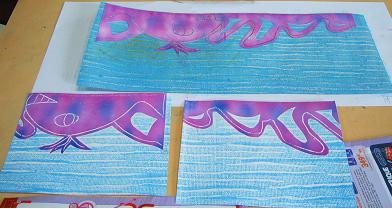
The printed page…
Another way to make a template for printing an image: After “carving” the drawing, fill it in with glue until the “ditch” becomes a “hill” and allow to dry.
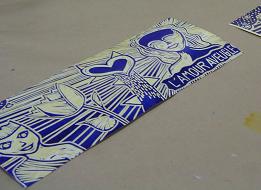
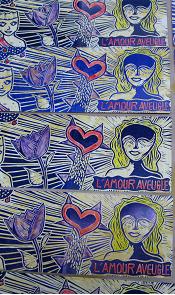
Here is the result:

Another way to print: Carving linoleum…
…Inking it…
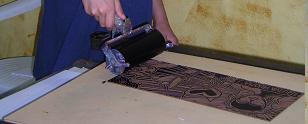
…Raw print…
…And after adding some paint…
Step 5 Printing the Words:
The stories had been written at school. Each child had a printed paper with a map of the set of compartments to know where the letters were for printing the words.
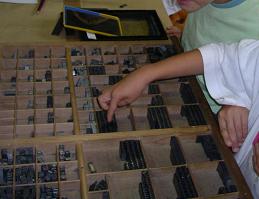
Printing…
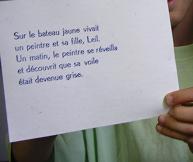
A printed page…
The younger kids made a stenciled cover…

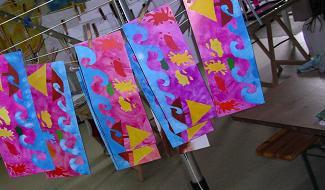
Covers hanging to dry…
Step 6 Binding the Book:
Holes are drilled all the way through the book for the binding…
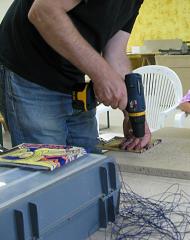
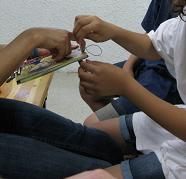
The books were binded by “Japanese binding”: it’s done by sewing…
Two of the Books:
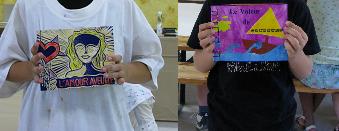
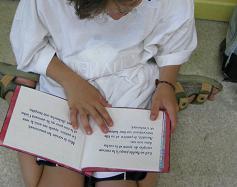
Time to read my brand-new self-made book!
Many thanks to Monique Palomares for sharing this with us!
-Mama Lisa
This article was posted on Saturday, July 5th, 2008 at 5:38 pm and is filed under Arts and Crafts, Bookmaking, Books & Stories, Countries & Cultures, Crafts, France, Mama Lisa, Papermaking, Printing, Teaching, Traveling. You can follow any responses to this entry through the RSS 2.0 feed. You can skip to the end and leave a response. Pinging is currently not allowed.


July 22nd, 2008 at 2:48 pm
i am looking after the words of a song by a russian child in russian. the song starts…pousigda budu…maybe someone can help? thanks anyway and lots of happines and calm.
February 23rd, 2010 at 10:10 pm
It looks like you might be able to use acrylics on water to marbleize paper – but I haven’t tried it. Check out Suminagashi.